 | 100% GROWN & SPUN IN AMERICA
No products in the cart.
Farm News
Measuring Gauge
Now that you’ve completed your swatch, and it’s been washed, blocked, and dried, it’s time to measure it to see what kind of fabric you’ve got.
You’ll need a ruler that’s at least 6′ long and your swatch, a flat surface, and a pointed object like a knitting needle will be helpful too. (Use it as a pointer when you count your stitches.). Check to make sure your ruler has a border before the measuring lines start, like this great Morehouse Ruler/Needle Gauge from Katrinkles.
*If yours doesn’t have the border, you need to adjust how you measure. Why? This is an important lesson from my very first ag mechanics class! The end of most rulers or tape measures starts exactly with the 0 and as it’s used, it’s subject to wear and that will cause your measurement to be off! If some kind of protection is added to the end (think the pull tab or metal bracket on the end of a retracting tape measure), that will also affect the length, so play it safe and start with 1.

Lay the ruler down on the work and make sure the 0 inch mark is aligned with the edge of your stitch. This means a V should be pointing upward and you’re on the up side of the slant.
Now start counting stitches, from left to right, starting with the one that lines up with the 0 inch mark on the ruler.
Keep counting until you get to the 4 inch mark (or 5 inch mark, if you started at the 1 inch mark). If the edge of a stitch lines up exactly with the 4 (5), great! If not, keep going until you get to the next line that matches the edge of a stitch. You need measure over at least the 4 inches so you get a good representation of gauge. If you do it overly one inch, you run the risk of a tight spot or a loose spot and throwing the whole thing off.
Write down the number of stitches and the line it matches. (If you’re starting with the 1-inch mark and going to the 5-inch mark, be sure to subtract 1 from the measurement to get your length.)
Now, divide the number of stitches by the length and that’s your gauge: stitches per inch.
30 stitches divided by 4 inches equals 7.5 stitches to the inch.
* If I measured over and found that 30 stitches was 4.5 inches, I should use that measure of length, not back up to the 4″. Why? Because there’s no way to measure a fraction of a stitch.
Let’s follow this through: 30 stitches divided by 4.5 inches = 6.67 stitches per inch.
It doesn’t seem like that big of a difference, but over a sweater that measures 40″ around, that’s a difference of an extra half inch for every 4 inches planned… so 40 inches / 4 inch sections = 10, you’ll have 10 extra half-inches or 5 whole inches extra in your sweater (which in most cases means you’ll be knitting a sweater one, maybe two sizes bigger than planned AND need more yarn)!
One other consideration that I’ve never seen mentioned in gauge, but I think it’s worth considering: it should be stretchy. Think about it. Have you ever knit a hat that turned out too small? This happens often with our first fair isle or color work projects. Most of us have, we’re so worried about wasting yarn or about things getting caught on the floats that we pull too tightly. We might get gauge, but then we’re really frustrated that the hat doesn’t fit. Why not? Because it’s supposed to be that gauge in a relaxed state, but hats need to stretch to fit your head!
So what do I do if my swatch doesn’t match the pattern?
First, congratulate yourself that you have a new square for your blanket.
Then, take a look at your measurements.
If you have MORE stitches per inch than is called for, you need to use bigger needles to get fewer stitches per inch.
If you have LESS stitches per inch than is called for, you need to use smaller needles to get more stitches per inch.
How much bigger or smaller? That depends on how far you are from where you want to be and what weight yarn you are using. Needle material can also matter – I’m a much looser knitter on metal needles than I am on bamboo.
And one more thing – I’ve found it really helpful to keep a journal. I note the date, the needle size,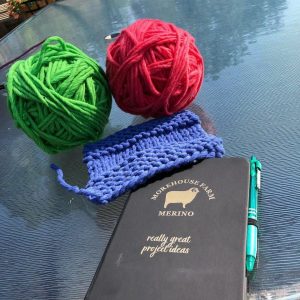 the yarn and my swatch gauge. I also like to add the yarn manufacturers’ recommended gauge info so I can compare to mine. That’s how I figured out I need to be 2 needle sizes smaller than what the package says. What can I say? I’m just a laid-back kind of knitter.